Set Up Your Lab Environment
Option 1: Use GitHub Codespaces
This method runs the entire environment inside your web browser. You do not need to install Docker or any other tools on your local machine.
- Fork the Repository:
- Go to the main GitHub page for the lab repository.
- Click the “Fork” button in the top-right corner. This will create a copy of the project under your own GitHub account.
- Open Your Fork:
- Go to the GitHub page of your newly created fork.
- Launch Codespaces:
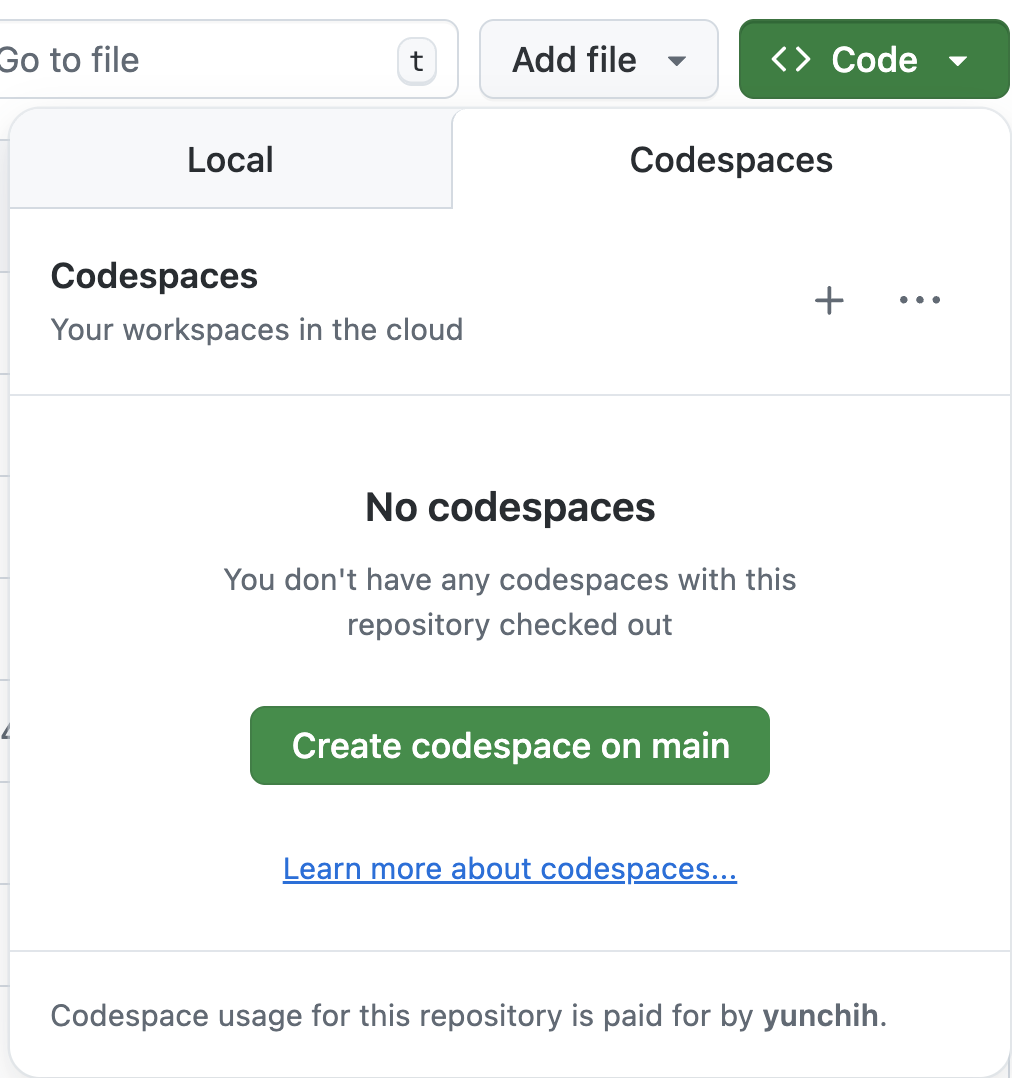
- Click the green
< > Codebutton. - Select the “Codespaces” tab.
- Click “Create codespace on main”
- GitHub will build the container. This might take a few minutes the first time.
- A full VS Code editor will open in your browser. You’re ready to start!
Option 2: Use Local Development
This method runs the container on your own computer. It’s great if you prefer working locally. Before you start, you must install and run these two applications on your computer: Once your prerequisites are installed and Docker is running:One-Time Setup
Ctrl+Shift+X).
2. Open the project in devcontainer
F1 or Ctrl+Shift+P), type Reopen in Container, and select the “Dev Containers: Reopen in Container” command. 4. The first time you do this, VS Code will need to build the Docker image. This might take several minutes. Once it’s finished, your VS Code window will reload. You can confirm it’s working by looking at the green remote indicator in the bottom-left corner, which should say “Dev Container: [Project Name]”.